• Skip to content
  • Skip to primary sidebar

Header Right

  • Home
  • About
  • Contact

QuickBooks

3 Ways to Receive Payments in QuickBooks Online

September 16, 2025 by admin

Subscription Billing on Laptop, Automate Recurring Payments for Business Success, Vector Flat IllustrationGot customer payments coming in? QuickBooks Online has multiple ways to accept and record them.

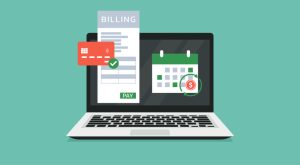
One of the biggest challenges small businesses face is managing a steady cash flow. Keeping income ahead of expenses is a constant balancing act. QuickBooks Online can help. With easy-to-use forms and a convenient mobile app, it helps you track and deposit incoming payments with ease.

Do you ever receive instant payments for certain products or services? Ever need to record a sale on the go—both for your records and your customer’s? Or maybe you send out invoices and want to ensure payments are accurately logged once they come in. QuickBooks Online has you covered in all these scenarios. Plus, it offers automation tools that speed up the payment process—so you can get paid faster and focus on growing your business.

Let Customers Pay Online

If your business sends invoices for products or services, QuickBooks Online makes it easy to record customer payments. While you can manually enter payments, there’s a faster, more efficient option: QuickBooks Payments. This built-in merchant service lets you accept credit card and bank payments electronically—helping you get paid quicker and streamlining your cash flow.

Once QuickBooks Payments is set up in QuickBooks Online (contact us if you need help), your invoices will include integrated payment options for credit cards and electronic checks. Each invoice will feature a payment button, allowing customers to easily enter their payment information. You’ll be able to track when an invoice is viewed, paid, and deposited. Simply open your list of invoices and click on one to view its details. A timeline panel will slide out from the right side, showing the invoice’s history and status. Plus, you can opt to receive notifications for invoice activity.

If you prefer to record payments manually, find the unpaid invoice in your list and click the Receive Payment link at the end of the row. This opens the Receive Payment screen, where you can fill in any missing details and save. You can also find the same link on the invoice screen itself or from the Invoices page (SalesInvoices).

You can receive payments manually in QuickBooks Online from an invoice itself or from the Invoices page.

There’s no cost for setting up a pay-as-you-go account in QuickBooks Payments. There are only per-transaction fees:

●     ACH bank payments are 1%.

●     It’s 3.5% if the payment comes in through an invoice (Apple Pay, Google Pay, credit cards, etc.) or if the payments are keyed in.

●     If you swipe a card, you’ll pay 2.4%

There’s also a $0.30 fee per transaction. Transaction fees are slightly lower if you pay $20 per month. Payments that come in before 3 p.m. PT should be in your account the next business day.

Accepting Payments Through GoPayment

To take payments while you’re on the road, you’ll need a free mobile card reader from Intuit that connects to your smartphone. It supports tap, chip, and digital wallet payments. You can also manually enter card details (see above rates). To process transactions, you’ll need to download the GoPayment app, available for iOS and Android. The app lets you add product names, prices, and images to make checkout faster and easier. Multiple layers of security are in place to help protect your data during mobile transactions.

Receiving Instant Payments

Sometimes, you’ll receive payment right after delivering a product or service. In these cases, QuickBooks Online allows you to create and provide a sales receipt on the spot. Just click +New in the upper left corner, then select Sales Receipt in the Customers section. The form that opens will look similar to an invoice or estimate. Choose the customer in the upper left corner, and fill out the remaining details as you normally would. When you’re finished, click Save and send to email the receipt. You’ll have the option to preview it before sending and to print it.

The Undeposited Funds Account

The Undeposited Funds account in the QuickBooks Online Chart of Accounts

If your customer paid you on the spot with a credit card, that payment would be processed in your QuickBooks Payments merchant center. But what about a physical check? QuickBooks Online defaults to the Undeposited Funds account for sales transactions. You can change this, but we don’t recommend it. This account temporarily holds payments—typically cash and checks—that haven’t yet been deposited into your bank.

It’s a good idea to review this account regularly to ensure you’re not leaving funds languishing. Hover your mouse over the Transactions link in the toolbar and click Chart of Accounts. Scroll down until you find it, as pictured above. To combine the transactions in the Undeposited Funds account to make a bank deposit, click +New in the upper left corner and then click Bank deposit under Other. Make sure the Account in the upper left corner is set to the account where you want to deposit the funds. Click the box in front of each check you want to deposit (or Select all), then Save.

To see your deposit information, click Reports in the toolbar, then  click Deposit Detail under Sales and Customers. You’ll have to list the deposits individually on your physical deposit slip. Make sure that the slip matches what you see in QuickBooks Online.

If you need help or have questions, feel free to contact us to schedule a consultation. While the process of receiving payments isn’t overly complicated, it’s essential to ensure every payment is recorded accurately and deposited correctly into your bank accounts.

Filed Under: QuickBooks

Is Your Favorite Pastime Turning Into a Small Business? The IRS Wants to Know.

February 10, 2025 by admin

Young serious man looking at laptop. Man learning new hobby, knitting on needles. Knitting project in progress. - ImageIf you’re making $400 or more on your hobby, it’s time to start declaring it on your income taxes.

We take on hobbies because we enjoy them. But at some point, we sometimes get enough people wanting the woven towels or the birdhouses or the Christmas ornaments we make that it’s time to start charging for them. Supplies cost money, and your time is certainly worth something.

A lot of people get started that way. Before you know it, they’ve set up a shop on Etsy and started exhibiting at craft shows. At what point does this become a business, they may ask themselves.

If you’re bringing in $400 or more per year on your side gig, you should know that there are two good reasons why you should be reporting your business on your Form 1040:
• You’ll be able to deduct at least some of your expenses, and,
• The IRS mandates it.

8 Questions

When your hobby becomes a small business, you’ll have to complete and file a Schedule C with your 1040.

If your personal enterprise has turned a profit in three of the last five years, it’s quite likely that your creative endeavors have become something that requires a Schedule C along with your 1040. The IRS suggests that you ask yourself eight questions to help determine whether it considers you a business and not a hobby. They go something like this:

1.   Does the time and effort you put into the activity show you intend to make a profit?

2.   Does the activity make a profit in some years, and if so, how much profit does it make?

3.   Can you expect to make a future profit from the appreciation of the assets used in the activity?

4.   Do you depend on income from the activity for (at least part of) your livelihood?

5.   Are any losses due to circumstances beyond your control or are the losses normal for the startup phase of your type of business?

6.   Do you change your methods of operation to improve profitability?

7.   Do you carry out the activity in a businesslike manner and keep complete and accurate books and records?

8.   Do you and any advisors you might work with have the knowledge needed to carry out the activity as a successful business?

How Will You Report Your Income?

Depending on how much money you make and where/how you sell your products, you may receive a 1099 of some sort. If you accept credit cards, it will most likely be the 1099-K: Payment Card and Third-Party Network Transactions. If you take checks and cash, you’ll have to add it all up yourself. Keep any documentation you have if this is the case. You’ll report this on your Schedule C.

How Will You Know If An Expense Is Deductible?

Some business expenses are obvious. If you’re making birdhouses, for example, everything you buy to assemble them should be considered part of your Cost of Goods Sold. If you’re buying products wholesale and reselling them, that should be deductible, too.

But there’s a lot of gray area. The IRS says that legitimate business expenses are those that are “ordinary and necessary.” An ordinary expense is one that is typical and widely accepted in your industry. A necessary expense, on the other hand, is one that is useful and appropriate for your business operations. An expense doesn’t need to be essential to qualify as necessary.

Some small business owners really stretch the interpretation of “ordinary and necessary.” There’s a famous case where a company that had a warehouse tried to deduct the cost of cat food. The contents of the warehouse were attracting rodents and snakes, and they wanted to feed stray cats who would keep the population of unwanted visitors down. The IRS accepted it as a legitimate business expense.

Our point here is not that you should try to find some outlandish business expenses to deduct. But we want you to really think about what it costs you to do business. If you’re ever audited, you’ll have to make a case to the IRS about why you claimed a particular purchase as necessary for your business. Keep meticulous records of your purchases.

On to a New Year

Keep these things in mind as we move into a new year – and tax preparation season. You may want to consider reclassifying your hobby as a business and filing a Schedule C with your 1040. We’re not IRS auditors, of course, so we can’t tell you whether a certain purchase will be considered a deductible business expense. But we can help you deal with the tax-related issues you’ll face should you decide it’s time for you to start claiming income and expenses for your pastime-turned-business.

Filed Under: QuickBooks

How to Set Up a Bookkeeping Cycle in QuickBooks Online

January 10, 2025 by admin

Young female financier with calculator working inside office at workplace, businesswoman behind paper work satisfied smiling, good achievement results, working with contract, accounts and charts.Do you have a regular schedule you follow with your QuickBooks Online work? It can be a good strategy.

Bookkeeping is cyclical. You tend to do the same things over and over, which may get to be a bit of a drag for you. QuickBooks Online can automate some processes, and it certainly helps minimize duplicate data entry, but you’ll undoubtedly find yourself growing weary of repetitive tasks.

We can’t help you avoid this drudgery completely, but we’d like to suggest a new, more organized way to attack your accounting tasks in 2025. It could be especially helpful if you’re a new QuickBooks Online user and don’t have a routine established yet. But even long-time users might find this routine helpful. It can keep things from slipping through the cracks and simply make you more productive and confident that you’re addressing all of your accounting issues.

Give it a try and see what you think.

What Should You Do Every Day?

Even if you don’t have expenses to enter or invoices to process, it’s a good idea to log into QuickBooks Online every day. If you’ve connected your online bank and credit cards to the site (which you absolutely should), there will probably be transactions to go over. So after you’ve taken a look at your Dashboard (especially your Tasks), hover your mouse over Transactions in the toolbar and click Bank transactions.

Click Update in the upper right to make sure you’re seeing the most recent transactions. If you’re doing this every day, it shouldn’t take long to go over the income and expenses that have been imported since you last logged in.

You should be looking at newly imported transactions daily and completing the fields provided as comprehensively as possible.

If you don’t know what Match or Record as transfer mean, we should schedule a session to go over transaction management in QuickBooks Online.

Every Week

You need to be monitoring your accounts receivable and payables on a weekly basis – at minimum. There are two ways to do this. You can:

Run reports.

• Click Reports in the toolbar and scroll down first to Who owes you. Run Accounts receivable aging summary. QuickBooks will display past-due transactions in several columns (Current, 1-30 days, 31-60 days, 61-90 days, and 91 and over). If you’re keeping up with your receivables, you shouldn’t be seeing numbers in most of the columns, unless you’re in a known collections process.

• Scroll down to What you owe and run Accounts payable aging summary. This works like the aging receivables report. Again, you shouldn’t be seeing much activity here unless you’re in a payment dispute with a vendor.

• You can also run the Open Invoices report to quickly see the Due date and Open balance entries here. Ditto the Unpaid Bills report.

Consult the All sales page.

Hover your mouse over Sales in the toolbar and click All sales. The colored bars and numbers at the top of the page show you the status of your sales. Click the orange bar in the middle to see a list of overdue invoices. If there are any, you can set a Send reminder by clicking the corresponding down arrow in the Action column. While you’re there, look at estimates and unbilled income and take any action needed.

Every Two Weeks (or more often, depending on product volume)

If you sell products and track inventory in QuickBooks Online, you should keep a close eye on your stock to see if you need to:

• Reorder,

• Bring in a larger supply because something is selling well, or,

• Discount or discontinue a product because it’s not selling.

Click Reports in the toolbar and run Product/Service List under Sales and customers and look at the Quantity on hand column.

Every Month

Reconcile your accounts (Transactions | Reconcile).

It’s really, really important that you reconcile your accounts every month. We can help you with this.

No one likes to do this, but it’s way easier to do regular reconciliations than it is to have to go back several months to track down a problem. If you’ve never done this in QuickBooks Online, it works similarly to how you used to reconcile your accounts by comparing a bank statement and your paper checkbook register. Only you’re comparing your bank or credit card statements to your accounts in QuickBooks Online. Before you start, make sure you’ve matched and categorized all of your downloaded transactions.

Run a Profit and Loss report for the last month.

Click Reports in the toolbar and click Profit and Loss under Business overview. Did you make a profit last month?

Every Quarter

If you’re planning to apply for a loan or looking for an investor, or if you just want a deeper understanding of how your business is doing, consider having us create and analyze standard financial reports for you, like the Balance Sheet and Statement of Cash Flows. You can run these yourself in QuickBooks Online, but it really takes an accountant’s eye to understand and interpret them.

If you decide that you want to work with us in any capacity, like helping you with reconciliation and/or modifying your Chart of Accounts, there’s another way we can help. If you ever have trouble categorizing an expense, select Uncategorized Expenses as the Category. If we’re meeting with you once a month, we can run a report on these and help you categorize them correctly.

Young female financier with calculator working inside office at workplace, businesswoman behind paper work satisfied smiling, good achievement results, working with contract, accounts and charts.

Filed Under: QuickBooks

How to Maintain Customer Records in QuickBooks Online

February 16, 2022 by admin

quickbooks helpYour customers are your company’s lifeblood. Make sure their records are thorough and up-to-date.

When companies buy other companies, what’s often considered the most critical asset? The customer list. When a business is damaged and data possibly lost, which set of records do they most hope to recover? The customer list.

You probably spend most of your time in QuickBooks Online working with transactions and reports, but your customer records deserve equal time. If they’re incomplete or otherwise not maintained well, you lose time filling in the blanks when you’re trying to complete a task that requires complete customer profiles. Your searches and reports may not tell the whole picture. Your relationships can suffer, and you may miss out on sales opportunities.

QuickBooks Online provides excellent tools for creating and maintaining comprehensive customer and sub-customer records. Here’s a look at how it all works.

Moving Your Customer Data In

There are two ways to create customer records in QuickBooks Online. If you have an existing database in Outlook, Excel, Gmail, or Google Sheets, you can import it. This will save you an enormous amount of time, but it’s a challenging process. You select the file you want to import, and then you have to “map” it by matching the fields in your database to fields in QuickBooks Online. You’ll likely need our help with this.

Quickbooks online tips

To import a customer file into QuickBooks Online, you’ll have to “map” its fields. We can help you with this.

Your other option is to enter records manually. This is time-consuming, but the more information you can include about your customers from the start, the better. You can always edit your records to add, delete, or modify what you originally entered.

To get started, hover over Sales in the toolbar and click on Customers. Then click on New Customer in the upper right corner to open the Customer information window. The only field you’re required to complete is Display name as. You may want to do this if you have a new customer on the phone and you want to concentrate on the conversation. You can take notes about their contact information and fill in the record later, when you’re off the phone.

But wherever possible, as we’ve already said, complete as many fields as you can. You’ll enter name and billing and shipping address and phone number(s) on the opening screen. You can also supply contact details like fax number and website.

Creating Sub-customers

You’ll notice a checkbox that says Is sub-customer. QuickBooks Online lets you “nest” related records under the “parent” record. This can be an actual customer, but many people use it to document jobs they’re doing for the customer. So if you’re a contractor, for example, you might have sub-customers like Sun deck and Spa.

If you want to set up such a record, enter the job name and click in the box next to Is sub-customer. Two fields will open below that allow you to select the parent customer and to indicate the sub-customer’s billing status. The remainder of the fields will automatically fill in with the parent customer’s contact information.

Quickbooks Online tips

You can set up jobs as sub-customers in QuickBooks Online.

Supplying Details

When you’re setting up individual customers, you should add as much detail as you possibly can to each record, beyond basic contact information. QuickBooks Online’s record templates display a number of tabs running horizontally across the window. The most important of these are:

  • Tax info. Are the customers taxable or exempt? If taxable, what is his or her Default tax code? (If you haven’t set up sales taxes yet and need to, please let us help. It’s complicated.)
  • Payment and billing. Do they have preferred payment and/or delivery methods? Will you be assigning default payment terms, like Net 30 or Due on receipt? What is their Opening balance? If they’re brand-new customers who have never ordered from you, this will be $0.00. If they’re existing, active customers, enter any outstanding balance they have with you as of the date that you enter. This must be correct, to avoid any problems with the customers’ ongoing balances. Questions? Ask us.

Other tabs here are self-explanatory. When you’ve entered everything you can, click Save. The new record will now appear in the Customers list and will be available to select from the drop-down list in transactions.

There will be times when you have to refer back to these forms to answer questions. By maintaining detailed, accurate customer records, you’ll be ready to respond. If you have questions about any of the information requested, or about other elements of QuickBooks Online that are puzzling you, please contact us so we can set up a consultation.

Filed Under: QuickBooks

Who Owes You? 5 QuickBooks Online Reports That Can Tell You Fast

October 20, 2021 by admin

Keep a constant watch on your accounts receivable to improve cash flow.

Quick: How many of your invoices are unpaid? Have any of your customers gone over 30 days past due? Did you bill all of the time and expenses for that project you just completed for a customer?

If you’re doing your accounting manually, there’s simply no way to get that information quickly. Depending on your bookkeeping system, you may not be able to get it at all.

QuickBooks Online has more than one solution for this problem. You see the first one every time you log in. The Dashboard contains a graphic in the upper left corner that tells you how many invoices are overdue and unpaid. Click on the colored bar labeled OVERDUE, and you’ll see a list of invoices with the unpaid ones right at the top.

You can tell at a glance how much of your money is tied up in unpaid invoices.

While this is important information for you to have as you start your workday, it doesn’t tell the whole story. To get that, you’ll need to access some of QuickBooks Online’s reports – five of them in particular. Click Reports in the left vertical pane, and then scroll down to the heading labeled Who owes you.

These reports are listed in two columns. Each has the outline of a star next to it. Click on the star, and the report will be added to the Favorites list at the top of the page. Click on the three vertical dots next to it, and you’ll be able to Customize the report. And as you hover over the title, you’ll see a small, circled question mark. Click on this to get a brief description of the report.

There are several reports in this list that can provide insight into where your outstanding revenue is. We recommend you run five of them at least once a week – more frequently if your business sells large quantities of products and/or services. The suggested are:

Accounts receivable aging detail

This report provides a list of invoices that are overdue, along with aging information. There are several columns in the report, but you’ll want to pay special attention to the last one: OPEN BALANCE.

Tip: If you have many customers or simply a high volume of unpaid invoices, you might consider running the Accounts receivable aging summary instead.

Changing the Content

Before you run the report, you should explore the customization tools provided for it. They won’t be the same for every report, but you can start to get an idea of what can be done. Hover over the report title and click Customize. A panel like the one pictured below will slide out of the right side of the screen.

QuickBooks Online provides deep customization tools for reports.

You can see some of your customization options in the image above. Beyond these, you can also work with filters and headers/footers. When you’re satisfied with your changes, click Run report.

If you want to run a report with its default settings, just click on the report title in the list to display it. You’ll have access to limited customization from there.

Four other reports you should be generating regularly are:

  • Customer Balance Summary: Shows you how much each customer owes your business
  • Open Invoices: Lists invoices for which there has been no payment
  • Unbilled Charges: Just what it sounds like: tells you who hasn’t been invoiced yet for billable charges
  • Unbilled Time: Lists all billable time not yet invoiced

We don’t expect you’ll have any trouble understanding reports like these; they’re fairly self-explanatory. QuickBooks Online offers many other reports, the standard financial reports that need to be generated monthly or quarterly, like Balance Sheet, Profit and Loss, and Statement of Cash Flows. You’ll absolutely need these should you apply for a loan or need to supply in-depth financials for any other reason. We can help you analyze them to get a comprehensive, detailed picture of your company’s fiscal health.

Filed Under: QuickBooks

How to Create Recurring Transactions in QuickBooks Online

March 15, 2021 by admin

A. Quarles CPA, PLLCQuickBooks Online saves time and improves accounting accuracy in numerous ways. One example is its support for recurring transactions.

It’s easy to get distracted when you’re doing dull, repetitive accounting work. That distraction leads to errors sometimes. So, besides the time you’re spending on work that could be automated, you have to tack on additional time to chase down your mistakes.

QuickBooks Online already reduces repetitive data entry by saving your lists of customers, vendors, products, etc., and making them accessible when you’re creating transactions. But it does more to save time and minimize errors by allowing you to create recurring transactions. Enter a transaction like an invoice or bill once, and QuickBooks Online memorizes it for future use!

Here’s how it works. Let’s say you have a customer who wants to rent a printer from you for one year. You create an invoice for one month’s rental. At the bottom of the screen, click Make recurring. A partial view of the screen that opens is pictured below.

Much of this screen will have already been filled in. You’ll need to enter a name for the template you’re creating at the top of the screen, one that will remind you of its content. In the second field, the drop-down list displays three options for how the recurring transaction will be handled by QuickBooks Online They are:

  • Scheduled. Your invoice will go out automatically at the scheduled interval, with only a change to the date. As with any automated process, you should be very careful when selecting this option.
  • Reminder. You will get a reminder ahead of each occurrence so you can make any necessary changes before sending.
  • Unscheduled. No automation is involved here. The invoice is memorized, but you’ll have to remember when it needs to go out.

If you chose Reminder, the next field will read Create (x) days in advance. Enter the number of days here. On the next line, you’ll only have to check or uncheck the Options.

Under Interval, you’ll tell QuickBooks Online when the invoice is scheduled to go out. You can choose from Daily, Weekly, Monthly, and Yearly. The invoice in this example should be processed and sent on the first day of every month. The start date is January 1, 2021, and it will end on December 31, 2021. If your recurring transaction should continue to go on indefinitely, you’ll have the option to select None from the drop-down list under End. You can also choose After.

Check the fields below this line to make sure they’re correct. You can change the message if you’d like and add an attachment. If everything looks correct, click Save Template in the lower right corner.

Using Recurring Transactions

If you’ve set this transaction up to recur automatically, you don’t have to do anything more with it unless you need to edit it at some point. If you need to do so, or if you’re responding to a reminder (or chose not to be reminded), you can access the list of transactions you’ve memorized by clicking the gear icon in the upper right and selecting Recurring Transactions under Lists. A screen containing this section will open:

The table that appears will contain other columns describing the recurring transactions, like Type and Interval. The image above shows the end of each row that reads Edit until you open the drop-down menu. You can see what your options are. They include Use, which you would select when you want to edit and/or send a transaction. You can also create a Duplicate, Pause the recurrences temporarily, Skip next date, or Delete the template. Click the arrow next to Reminder List in the upper right and select Run Report to see the Recurring Template List Report.

As you can see, recurring transactions can not only save time, but they can also help reduce errors and minimize unnecessary work. They’re not overly difficult to create, but you should use caution if you choose to automate them. We’re available to answer your questions about this useful tool and about any other element of QuickBooks Online. Stay healthy, and here’s to 2021!

Want to learn more about our QuickBooks accounting services? Give us a call a (336) 354-4352 or fill out our online form to request a free consultation today!

Filed Under: QuickBooks

  • Page 1
  • Page 2
  • Next Page »

Primary Sidebar

Search

Archives

  • October 2025
  • September 2025
  • August 2025
  • July 2025
  • June 2025
  • May 2025
  • April 2025
  • March 2025
  • February 2025
  • January 2025
  • December 2024
  • November 2024
  • October 2024
  • September 2024
  • August 2024
  • July 2024
  • June 2024
  • May 2024
  • April 2024
  • March 2024
  • February 2024
  • January 2024
  • December 2023
  • November 2023
  • October 2023
  • September 2023
  • August 2023
  • July 2023
  • June 2023
  • March 2023
  • February 2023
  • January 2023
  • December 2022
  • November 2022
  • October 2022
  • September 2022
  • August 2022
  • July 2022
  • June 2022
  • May 2022
  • April 2022
  • March 2022
  • February 2022
  • January 2022
  • December 2021
  • November 2021
  • October 2021
  • September 2021
  • August 2021
  • July 2021
  • June 2021
  • May 2021
  • April 2021
  • March 2021
  • February 2021
  • January 2021
  • December 2020
  • November 2020
  • October 2020
  • September 2020
  • August 2020
  • July 2020
  • June 2020
  • May 2020
  • April 2020
  • March 2020
  • February 2020
  • January 2020
  • December 2019
  • November 2019
  • October 2019
  • September 2019
  • August 2019

Categories

  • Best Business Practices
  • Business Tax
  • Estate and Trusts
  • Individual Tax
  • Investments
  • QuickBooks
  • Real Estate
  • Retirement
  • Uncategorized

Copyright © 2021 · https://www.aquarlescpa.com/blog